- Home
- Solutions
- Transactions
- Rule-Based Automation for Transaction Mapping: A Customer Guide
Rule-Based Automation for Transaction Mapping: A Customer Guide
Introduction
We're excited to introduce our new Rule-Based Automation feature for transaction mapping, un-mapping, and archival. This powerful tool allows you to take control of your financial transactions with unprecedented accuracy and efficiency.
Key Benefits
Accurate Application Mapping:
Create custom rules to ensure your transactions are mapped correctly every time.Transparency:
Gain full visibility into how transactions are assigned to applications.Flexibility:
Define complex rules using multiple conditions to handle even the most unique scenarios.Time-Saving:
Automate routine tasks and reduce manual intervention in transaction management.
Getting Started
Follow these steps to start managing your transactions with ease:
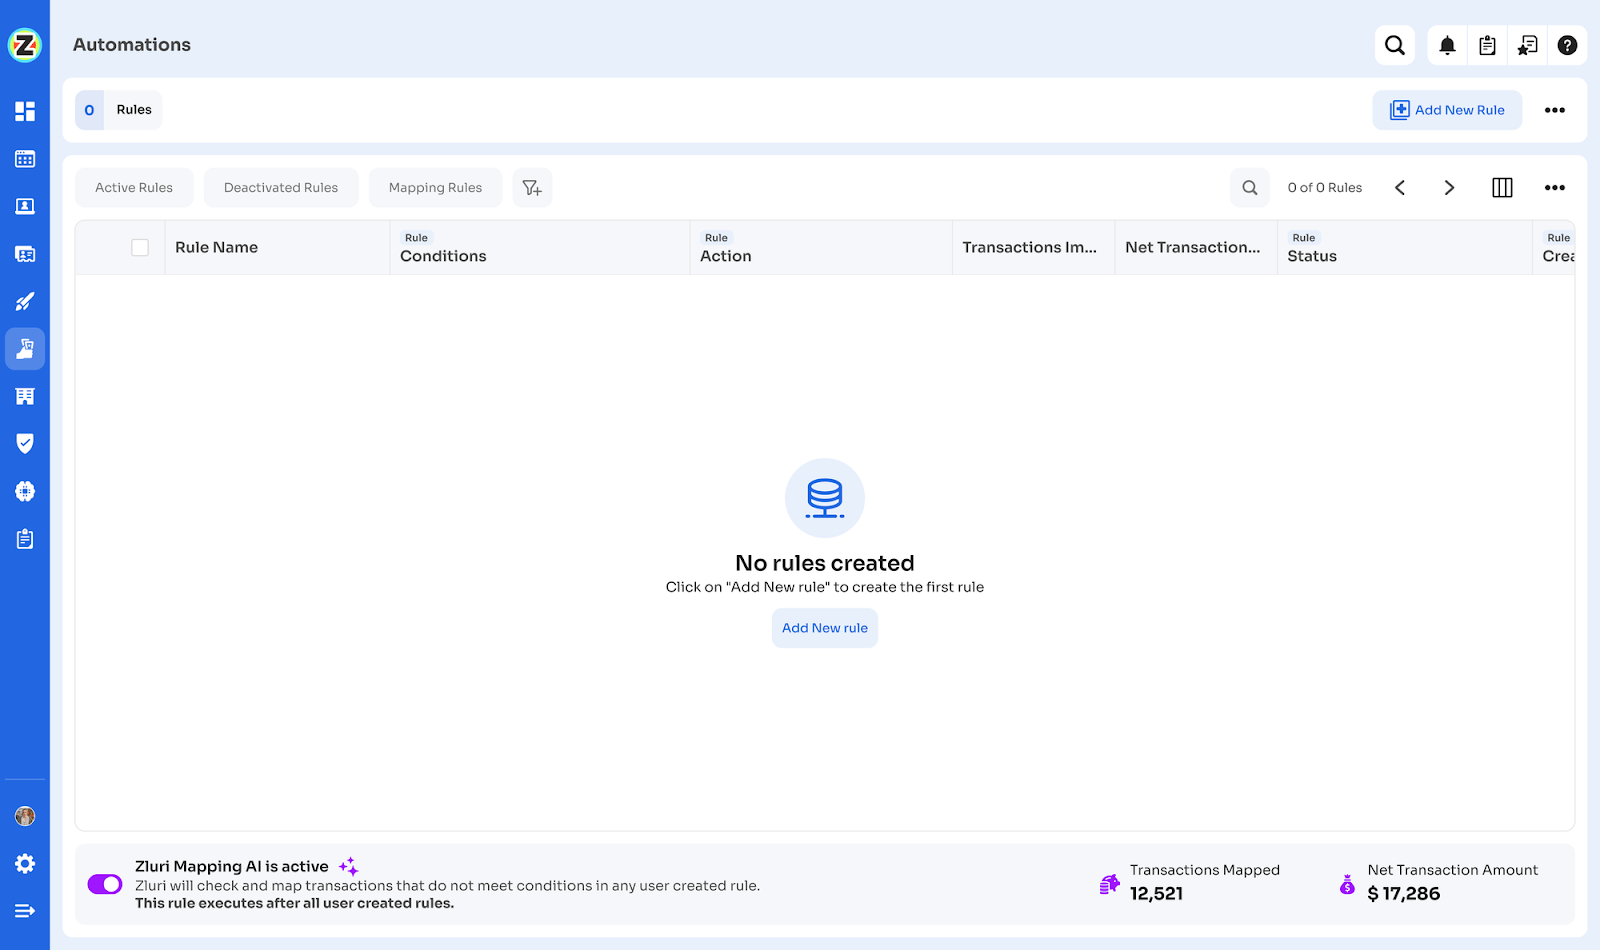
Access the Feature:
Log into your account and find the "Spends" section on the left panel.
Click on the new "Automations" tab to begin.
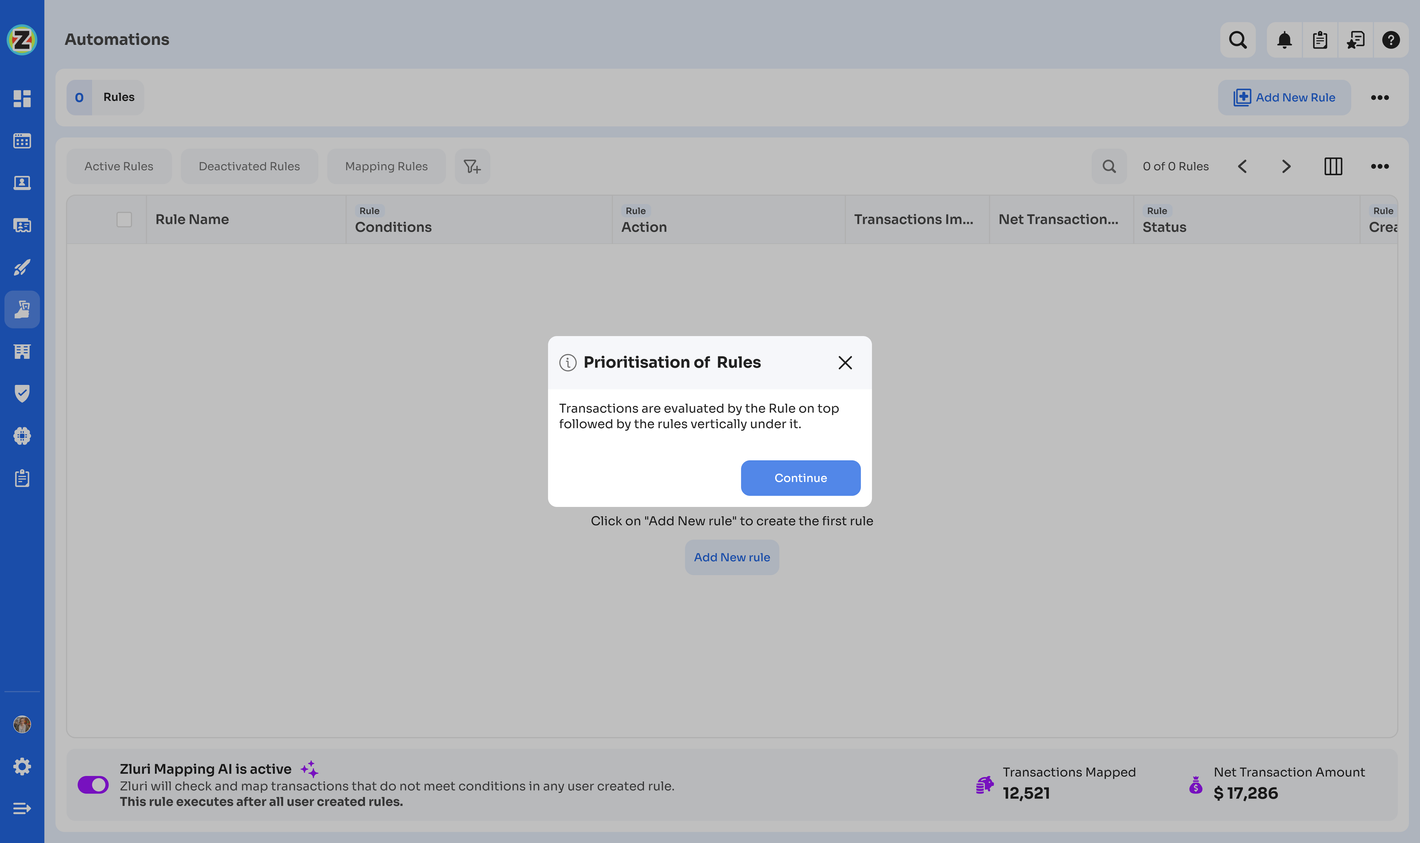
Understand Rule Prioritization:
When you first visit the Automations page, you'll see a helpful popup.
This popup explains how rules are prioritized, ensuring you understand how your rules will be applied.
Take a moment to read through this information – it will help you create more effective rules.
Create Your First Rule:
Look for the "Add New Rule" button and click it to start creating your custom rule.
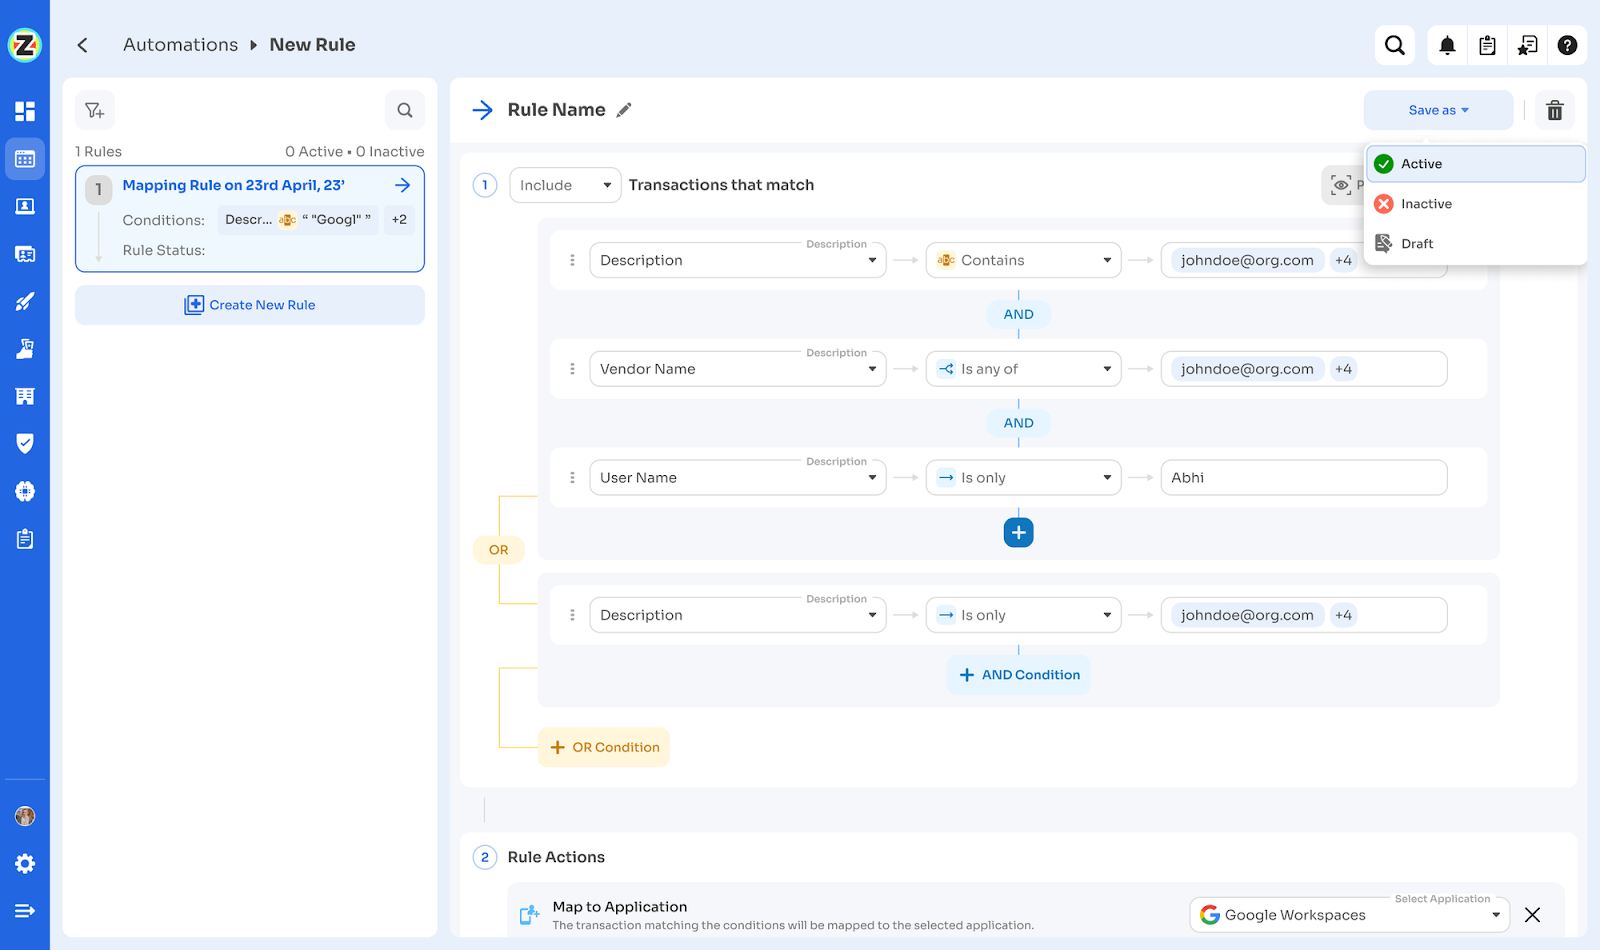
Name Your Rule:
Begin by giving your rule a clear, descriptive name. This will help you manage your rules easily in the future.
Set Rule Conditions:
Select the attribute for your rule condition. You can choose from:
Description
Vendor Name
(Note: Application attribute will be available in a future enhancement)
For more complex scenarios, you can add multiple conditions using AND/OR operators.
Preview Matching Transactions:
After setting your conditions, click "Preview Matching Transactions".
A side panel will show you which transactions match your rule.
Use filters to verify your rule's impact:
Time range
Transaction amount
Description
Choose an Action:
Once you're satisfied with your conditions, select one of three actions:
Map to application
Mark as Unrecognized
Mark as Archived
Save Your Rule:
After selecting an action, choose how to save your rule:
Save as Active: Your rule will start working immediately
Save as Inactive: Your rule will be saved but won't be applied yet
Save as Draft: Save your progress to finish later
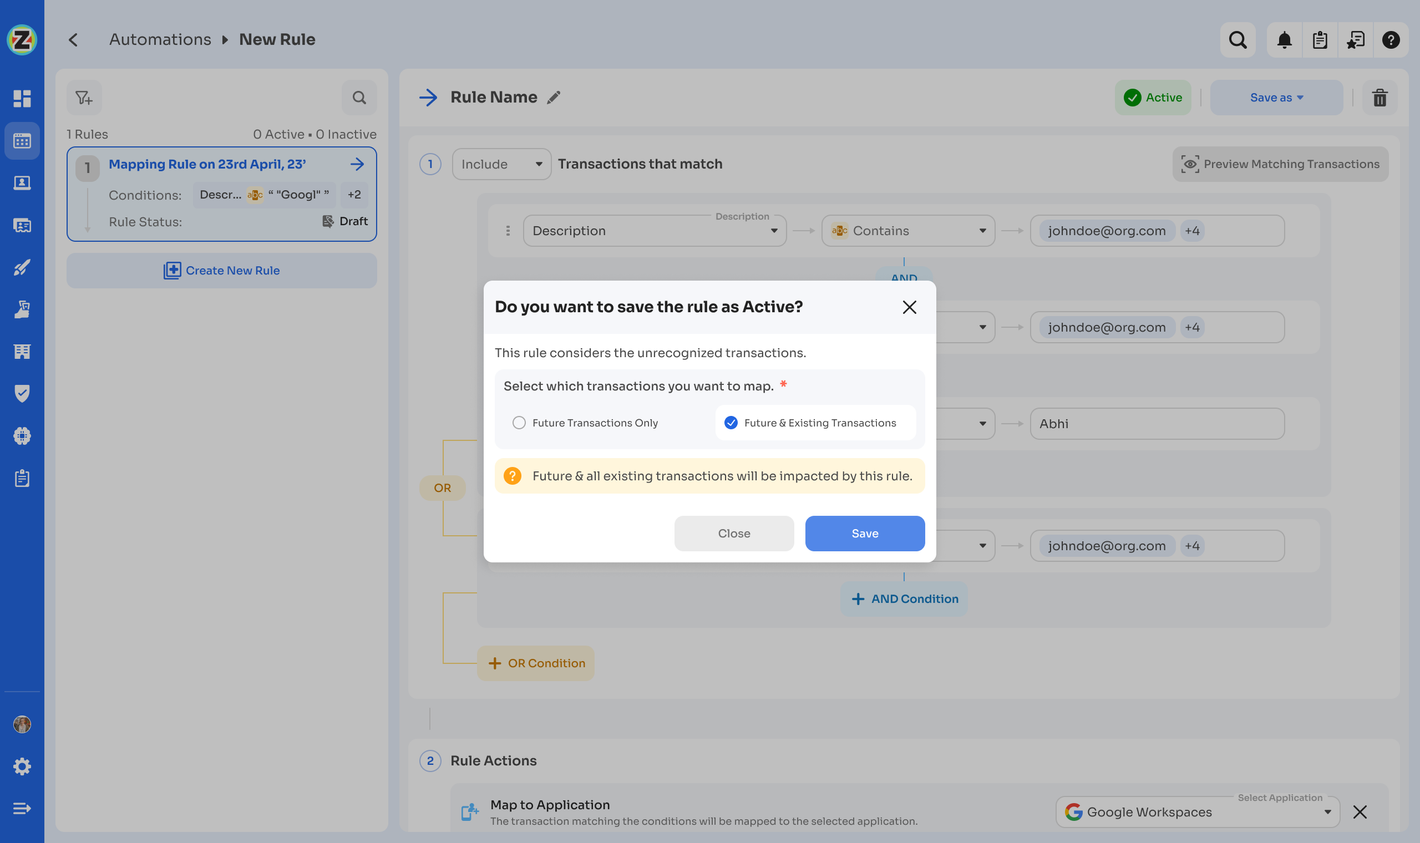
Activate Your Rule:
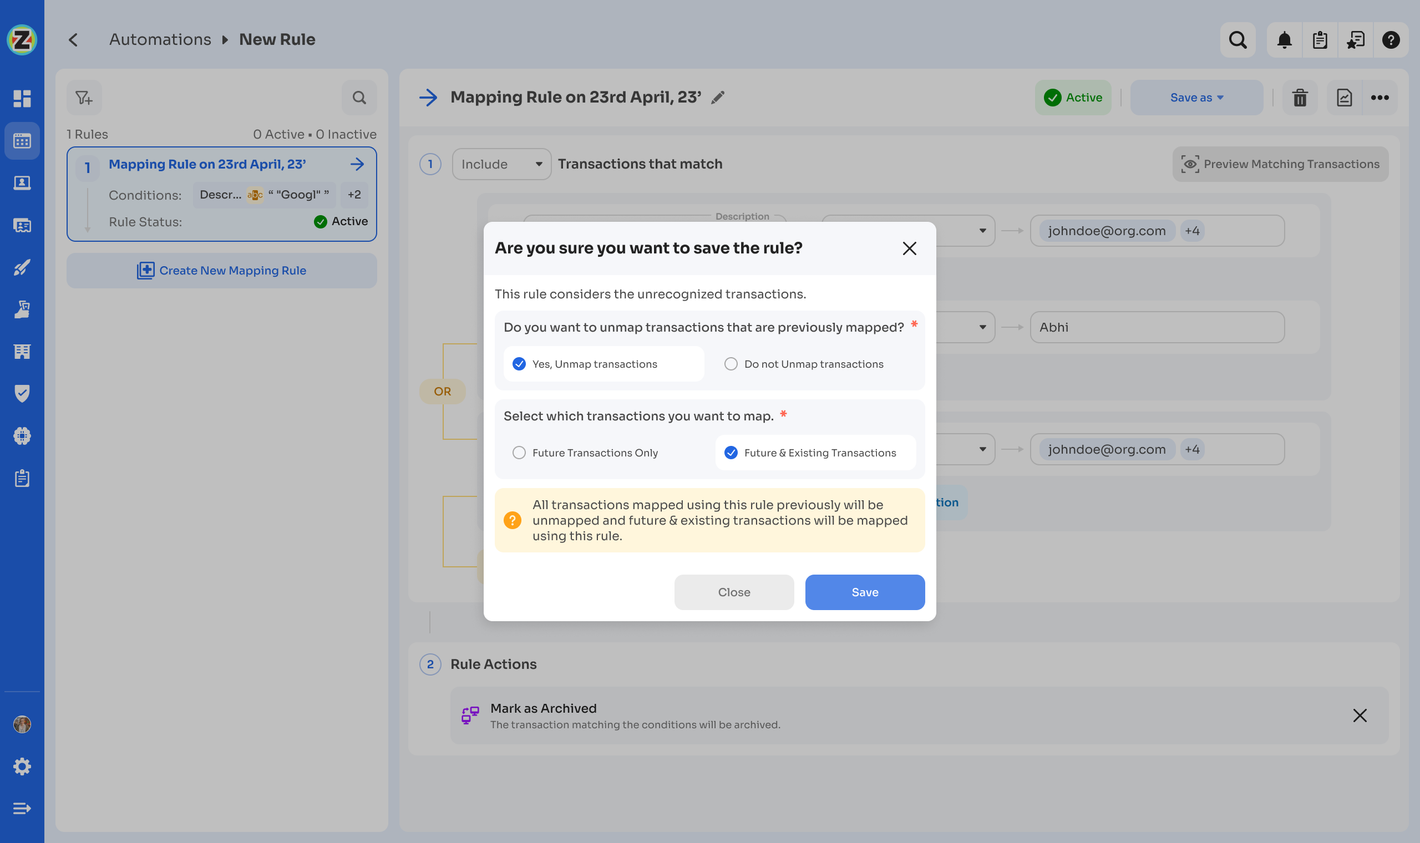
If you're activating a rule, you'll need to decide its scope:
Apply to future transactions only
Apply to both future and existing transactions
Understand Zluri Mapping AI:
Our AI helps map transactions based on patterns it recognizes.
It runs after all your custom rules and is on by default.
11. Modifying Rules:
You can easily deactivate, delete, or edit rules as your needs change.
a) Deactivating or Deleting a Rule:
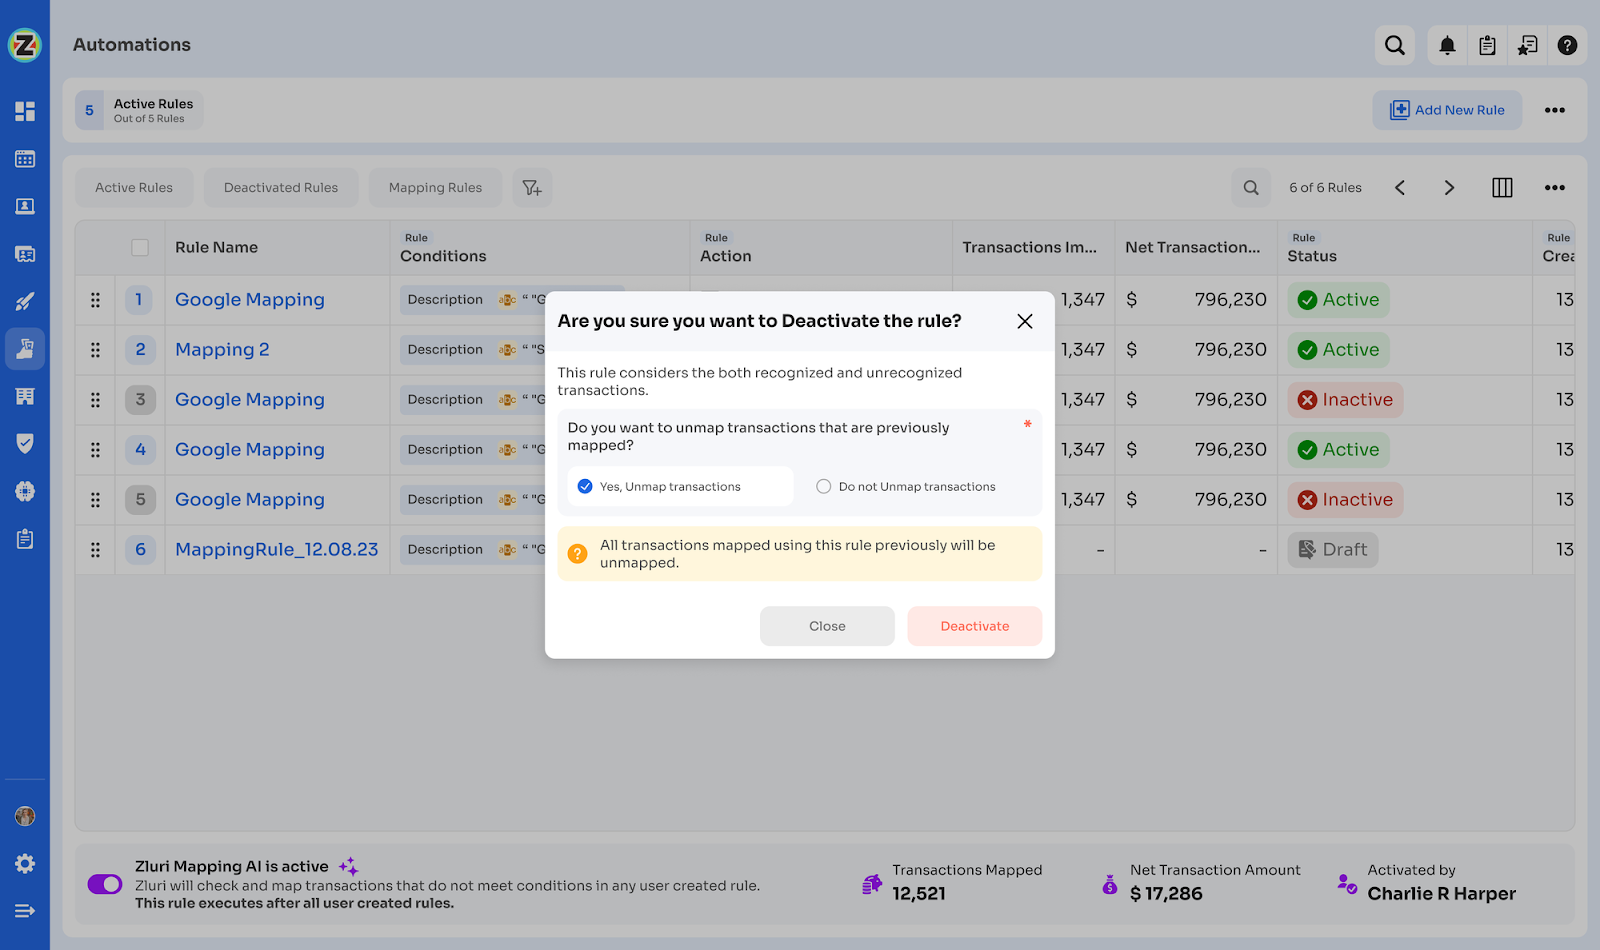
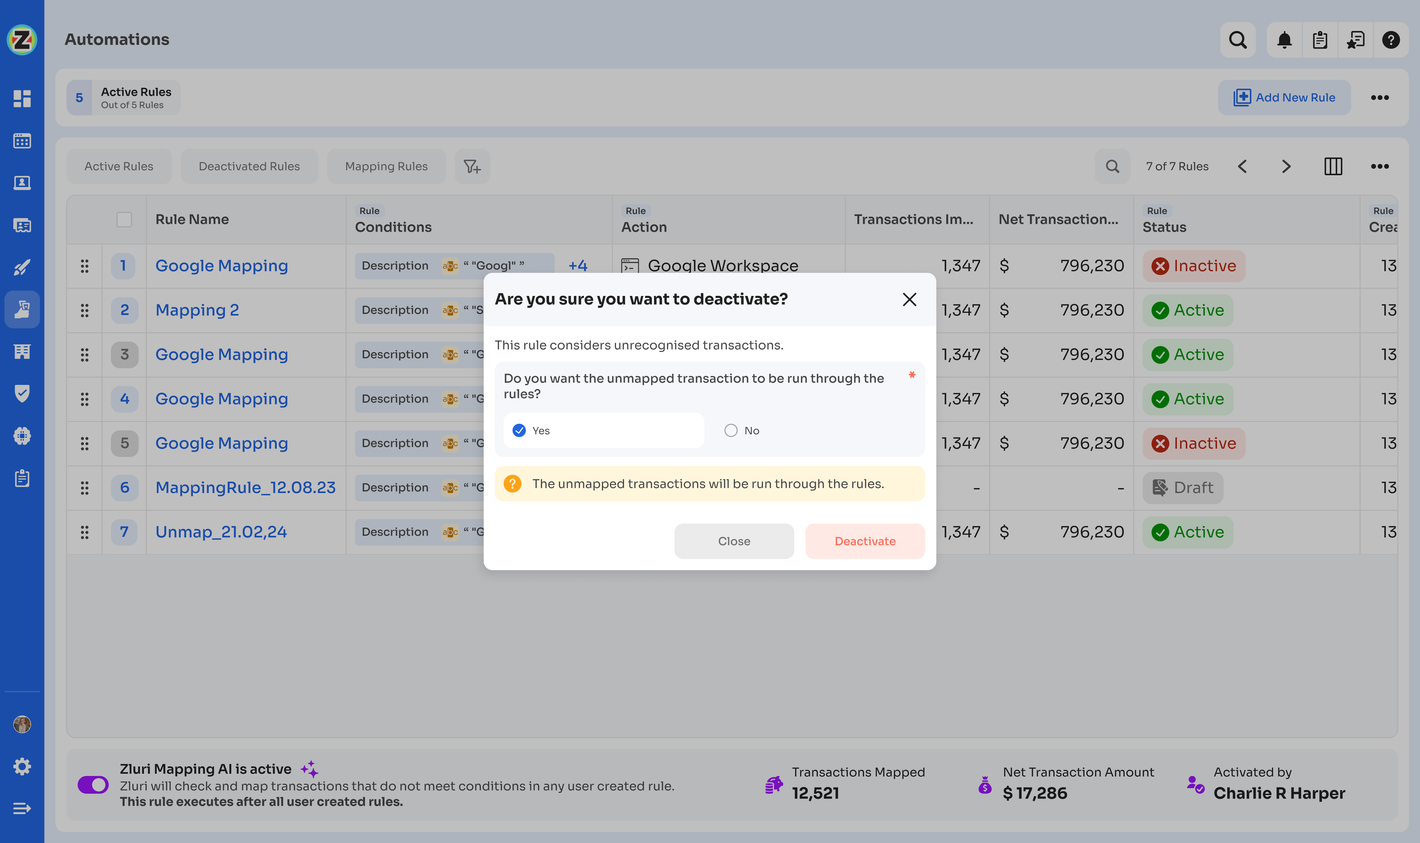
When deactivating a mapping rule, you'll have the option to revert the actions it performed.
For unmapping rules, you can choose to have impacted transactions go through all rules again.
When deactivating the Zluri Mapping AI, you'll have the option to revert its actions.
Note: Deleting a rule offers the same options as deactivating.
b) Editing a Rule:
If you modify an existing rule and reactivate it, you'll have the option to revert previous changes.
12. Executing All Rules:
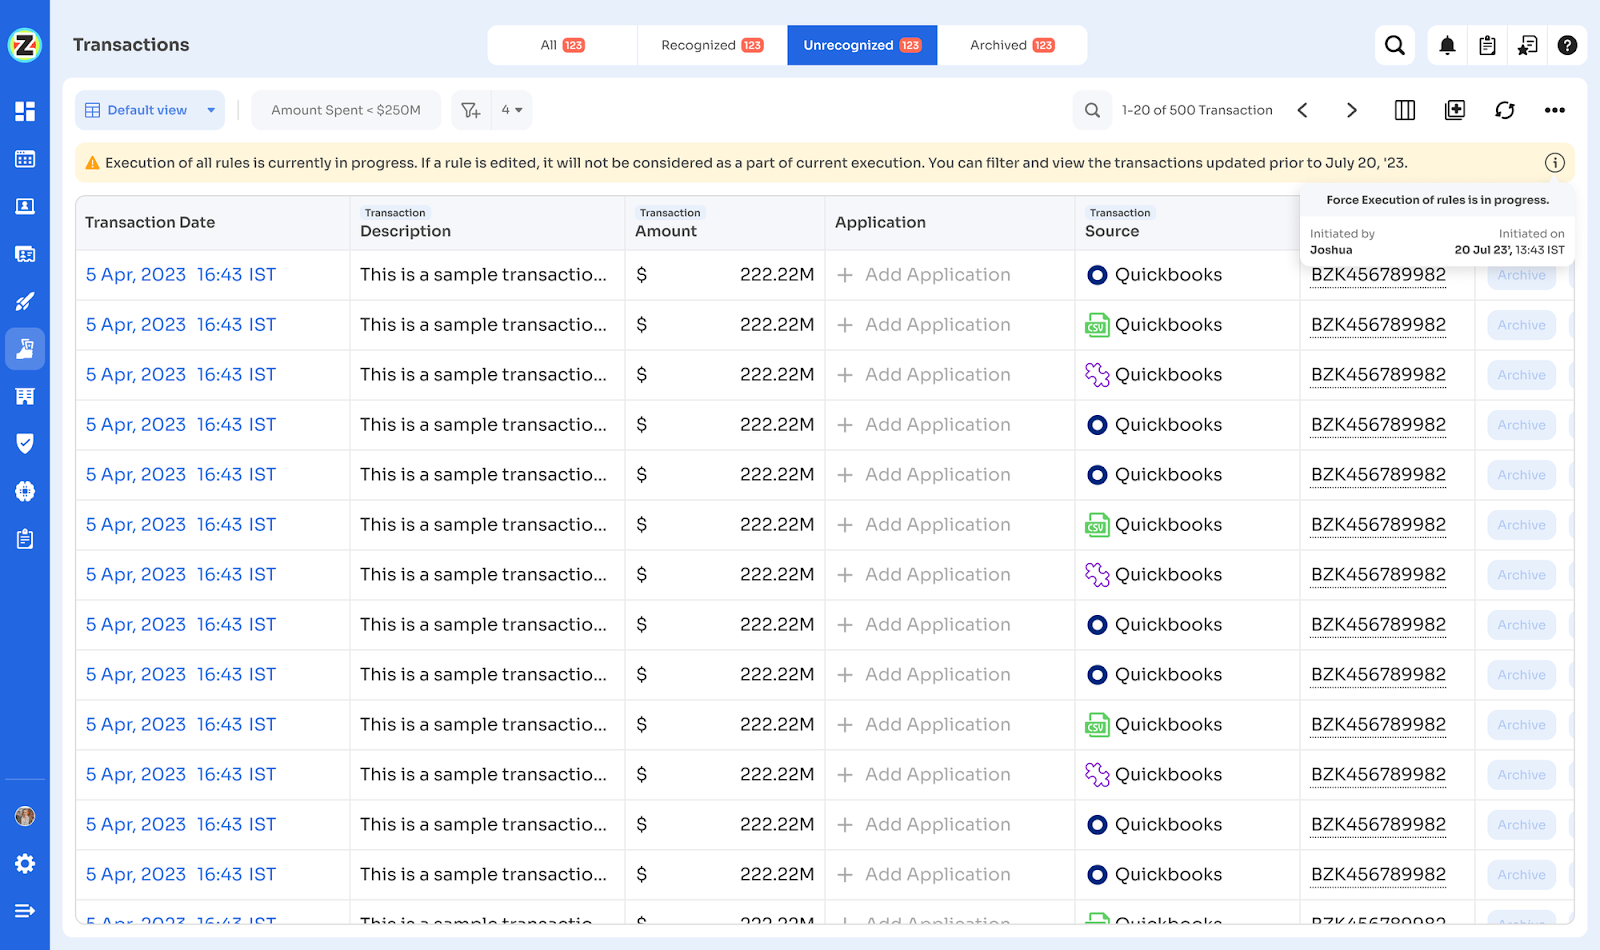
You can apply all your rules to either all transactions or just unrecognized ones.
a) Executing Rules on All Transactions:
Click the three-dot menu on the right side of the rule list table.
Select "Execute all rules".
You'll see a prompt to acknowledge the impact. Remember, this action is irreversible!
During execution, you can create new rules, but they won't be included in the current execution.
b) Executing Rules on Unrecognized Transactions:
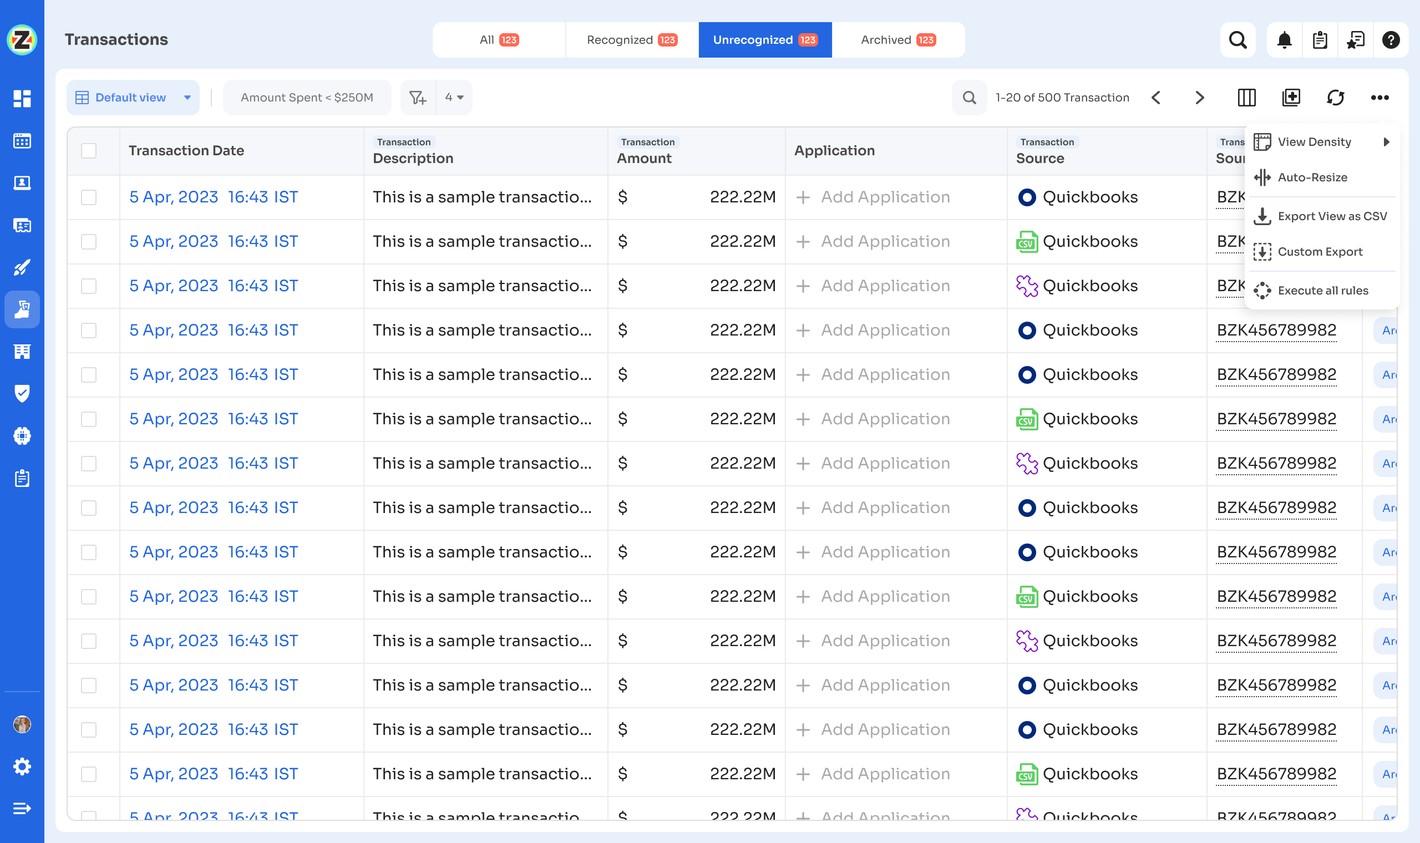
Find the three-dot menu next to the unrecognized transaction list.
Select "Execute all rules".
As before, you'll need to acknowledge the impact.
During execution, you can create new rules and apply filters to the transaction table.
Note: You can also find the "Execute all rules" option in the V1 screen of the transactions module.
13. Filtering Rules:
To help manage your rules, use the filters in the Rules table:
Rule name
Action type
Status
Creating Effective Rules
Rule Naming: Choose clear, descriptive names for your rules to easily manage them later.
Condition Setting:
Use transaction attributes like Description and Vendor Name to set conditions.
Combine multiple conditions using AND/OR operators for precision.
Action Selection: Choose from three actions:
Map to application
Mark as Unrecognized
Mark as Archived
Preview & Verify: Always use the "Preview Matching Transactions" feature to ensure your rule captures the intended transactions.
Rule Activation: Decide whether to apply the rule to future transactions only or include existing ones as well.
Best Practices
Start Simple: Begin with straightforward rules and gradually build complexity as you become more familiar with the system.
Regular Review: Periodically review and update your rules to ensure they remain relevant and effective.
Use the Zluri Mapping AI: Keep the AI feature enabled to catch any transactions your rules might miss.
Leverage Audit Logs: Regularly check the audit logs to understand how your rules are impacting transactions.
Test Before Large-Scale Implementation: Use the preview feature extensively when creating new rules or making significant changes.
Prioritize Rules: Remember that rules are executed in order. Place more specific rules higher in the list for better control.
Utilize Notifications: Pay attention to system notifications to stay informed about rule activations, deactivations, and impacts on transactions.
Backup Before Major Changes: Before executing rules on all transactions or making significant rule changes, ensure you have a backup of your current transaction mappings.
Need Help?
If you have any questions or need assistance with setting up your rules, please don't hesitate to contact our support team. We're here to help you make the most of this powerful new feature!
Was this article helpful?
That’s Great!
Thank you for your feedback
Sorry! We couldn't be helpful
Thank you for your feedback
Feedback sent
We appreciate your effort and will try to fix the article


